You can make a small kitchen feel and function like a much larger one without remodeling or spending a fortune. This article shows eight practical decorating moves that free up space, boost usability, and make the room look brighter and more open. You’ll find ideas that focus on smart storage, visual tricks, and purposeful lighting so your kitchen works harder and looks cleaner. Expect straightforward options you can apply immediately to maximize storage efficiency and create visual space. VASAGLE EKHO Collection – Bar Stools Set of 2, Counter Height Bar… [Style That Speaks] These bar stools come from our VASAGLE EKHO Collection—a furniture line that blends richly textured … [Sit in Comfort] The roomy 15″D x 17.7″W seat surface of these kitchen stools, enveloped in a smooth cover and filled wi… [Concealed Adjustable Feet] Enjoy stability and style. These stools, featuring concealed adjustable feet, provide stable… $98.98 Buy on Amazon 1) Install floating shelves to maximize vertical storage. Floating shelves free up counter space and use walls that usually go unused. You can store everyday dishes, cookbooks, or frequently used spices within easy reach. Buy on Amazon Choose materials that match your kitchen’s moisture and weight needs, such as solid wood, plywood, or painted MDF. Use sturdy brackets or concealed supports rated for the load you plan to carry. Keep the arrangement intentional: group like items, leave breathing room, and avoid overloading a single shelf. Add under-shelf lighting or a small rail for hanging utensils to increase function without clutter. upsimples 6 Pack Wooden Floating Shelves, Wall Storage Decor Shel… Centerpiece of Room Decoration – These shelves boast a distinctive design and an elegant shape, making them a focal poin… Effortless Installation – Installing shelves can often be a daunting task, but we’ve simplified the process with a desig… Wood Shelves Maximize Your Wall Space – Our floating shelves are designed to efficiently utilize every inch, adding an a… Buy on Amazon Install shelves at varied heights to accommodate tall items and create visual interest. In tight corners, consider corner floating shelves or a narrow vertical run to make the most of every inch. 2) Use light, neutral paint colors to enlarge the space visually Choose light neutrals—soft whites, warm beiges, pale grays, or muted pastels—to reflect more light and make walls seem to recede. That reflection increases perceived depth and reduces visual clutter, so your kitchen feels airier without changing its footprint. Keep paint transitions minimal between walls, ceiling, and trim. Using a single or closely related palette avoids harsh lines that break the space into smaller segments. Consider matte or eggshell finishes on walls to hide imperfections while still bouncing light; reserve satin for trim where you want a subtle contrast. Test samples on multiple walls and observe them at different times of day before committing. If you want a bit of color, pick a desaturated hue rather than a saturated one. The result remains calm and expansive, while still adding personality. 3) Incorporate under-cabinet LED lighting for better functionality. Install LED strips or slim light bars under your cabinets to brighten countertops where you prepare food. You’ll reduce shadows and improve visibility for chopping, reading recipes, and small tasks. Choose a color temperature around 2700–3000K for a warm, kitchen-friendly glow, or 3500–4000K for a crisper, more task-focused light. Dimmable fixtures let you shift from bright work lighting to softer evening ambiance. Pick plug-in models for easy retrofit, or hardwire if you want a cleaner, permanent look. Consider motion-sensor or stick-on rechargeable options if you prefer no wiring and simpler control. Run strips along the back edge for even illumination and hide wiring with small adhesive channels or inside cabinet bottoms. Proper placement minimizes glare and keeps your counters looking neat. 4) Choose multi-functional furniture like an island with storage Pick an island that does more than look good. You gain prep surface, seating, and hidden storage without adding clutter when the piece combines drawers, cabinets, and open shelving. Measure your space before you shop. A narrow aisle or tight clearance will ruin flow, so leave at least 36 inches around the island when possible, or choose a slim, mobile cart for smaller kitchens. Consider built-in features that match your routine: a pull-out trash bin, deep pan drawers, or a wine cubby keep everyday items accessible and off countertops. You can also integrate a cooktop or sink if plumbing and ventilation allow. Choose finishes that blend with existing cabinetry to create visual continuity. Matching materials make a small kitchen feel larger, while varied textures add interest without sacrificing function. 5) Opt for slim-profile appliances designed for compact kitchens. Choose appliances with narrow widths and reduced depth to free up walking and prep space in tight layouts. Slim-profile refrigerators, dishwashers, and range hoods deliver necessary functions without overwhelming your footprint. Look for units that prioritize vertical storage or stackable features so you can use wall and cabinet height more efficiently. Multifunction appliances—such as a combined microwave-convection oven or a two-burner cooktop with an integrated griddle—reduce the number of separate machines you need. Select finishes that match or blend with your cabinetry to create visual continuity and make the room feel larger. Stainless steel, matte, or panel-ready fronts can help maintain a streamlined appearance. Measure door swings and clearance carefully before buying to avoid fits that block aisles or cabinet doors. Prioritize energy-efficient models to lower running costs, since small kitchens often concentrate heat and ventilation needs. 6) Add a magnetic knife strip to free up counter space Mount a magnetic knife strip on a wall or the inside of a cabinet to keep knives off your counter and within easy reach. This clears valuable prep space and makes cleanup faster. Choose a strip sized for your collection and mount it at a comfortable reach—typically between chest and shoulder height. Secure it into a stud or use appropriate anchors for tile or drywall to keep heavier knives safe. Arrange knives by frequency of use so your go-to blades sit closest to your usual work area. Leave a little space between handles to prevent dinging and to make each knife easy to grab. A magnetic strip also works for scissors, metal spatulas, and small pans if you need more flexibility. Use a wooden or stainless strip to match your kitchen style while keeping functionality front and center. 7) Use clear glass cabinet doors to create depth and openness. Clear glass cabinet doors visually break up solid cabinetry and make your kitchen feel larger without removing storage. You retain enclosed storage while introducing sightlines that draw the eye inward, creating perceived depth. Display only tidy, curated items so interiors look organized from a distance. Stack plates, arrange matching glassware, and keep frequently used items accessible to balance form and function. Backlight glass-front cabinets or place them near a light source to enhance transparency and highlight contents. The added light reduces visual weight and amplifies openness during day and night. Frame glass doors with thin, simple mullions to maintain a clean look. Choose clear glass when you want maximum openness; reserve frosted or ribbed glass where you need concealment. 8) Incorporate pull-out pantry shelves for efficient storage. Pull-out pantry shelves turn narrow gaps and deep cabinets into usable space, so you can reach items without digging. You’ll avoid items getting lost at the back and save time during meal prep. Choose full-extension slides and sturdy materials to support cans, jars, and small appliances. Adjustable shelves let you reconfigure storage as your needs change. Install vertical pull-outs between appliances or at the end of a cabinet run to use wasted space. Slim units work well for spices, oils, and baking sheets. Label shelves or use clear bins to keep similar items together and visible. That simple step keeps your system functional and reduces clutter. Maximizing Storage Efficiency Focus on storing items where you use them and making each surface pull double duty. Prioritize easy-access zones for daily tools and hide less-used items in higher or deeper storage. Utilizing Vertical Space Stack cabinets to the ceiling to add 12–24 inches of storage for seasonal items. Use labeled bins on top shelves so you can pull what you need without unpacking everything. Install open shelving for frequently used dishes and spice jars. Keep heavier items on lower shelves; reserve eye-level space for items you grab daily. Add a wall-mounted rail with hooks for utensils, potholders, and a magnetic knife strip to free drawer space. Use narrow, tall pull-out cabinets beside the fridge or stove for baking sheets and cutting boards. Add shelf risers and slim baskets inside cabinets to double usable shelf area and prevent lost items in deep corners. Incorporating Multi-Functional Furniture Choose a kitchen island with drawers and built-in shelves rather than a plain cart. Select one with a pull-out cutting board, wine rack, or under-counter appliance garage to conceal mixers and coffee machines. Pick a dining table that folds into the wall or nests with chairs to clear floor space when not in use. Consider a banquette with lift-up seating for pantry overflow—store bulk staples, small appliances, or seasonal cookware inside. Opt for stools that tuck fully under the counter and a slim console with drawers for mail and small gadgets. Each piece should serve at least two storage or surface functions to justify its footprint. Creating Visual Space in Small Kitchens Use color, finishes, and light to make your kitchen feel wider and taller. Focus on paint, reflective surfaces, and layered lighting to increase perceived depth without changing the footprint. Choosing Light Colors and Reflective Surfaces Paint walls and ceilings in pale, warm neutrals — soft white, cream, or a warm pebble — to bounce daylight and reduce visual boundaries. Extend the ceiling color one shade lighter than the walls; this draws the eye upward and creates a sense of height. Select glossy or semi-gloss cabinetry and backsplashes that reflect light. Consider glass-front upper cabinets or a mirrored or high-gloss tile backsplash behind the stove and sink. Keep countertops in a light, subtle pattern to avoid visual clutter. Use consistent tones across large surfaces. Match cabinet hardware to window frames or light fixtures for continuity. Reserve darker hues for small accents or a single lower cabinet to anchor the room without shrinking it. Implementing Strategic Lighting Solutions Layer three types of lighting: ambient (recessed or flush mounts), task (under-cabinet strips for counters), and accent (small directional fixtures or LED tape). Proper layers reduce shadows that make corners feel cramped. Place under-cabinet lighting close to the backsplash to illuminate work surfaces and showcase reflective tiles. Add a narrow pendant over a peninsula or breakfast bar; choose a slim profile so the fixture doesn’t interrupt sightlines. Maximize natural light: remove heavy curtains, install a clear or sheer shade, and keep window trim the same light color as the walls. If natural light is limited, use high-CRI LEDs around 2700–3000K for warm, natural-looking illumination.
You can make a small kitchen feel and function like a much larger one without remodeling or spending a fortune. This article shows eight practical decorating moves that free up space, boost usability, and make the room look brighter and more open.
You’ll find ideas that focus on smart storage, visual tricks, and purposeful lighting so your kitchen works harder and looks cleaner. Expect straightforward options you can apply immediately to maximize storage efficiency and create visual space.
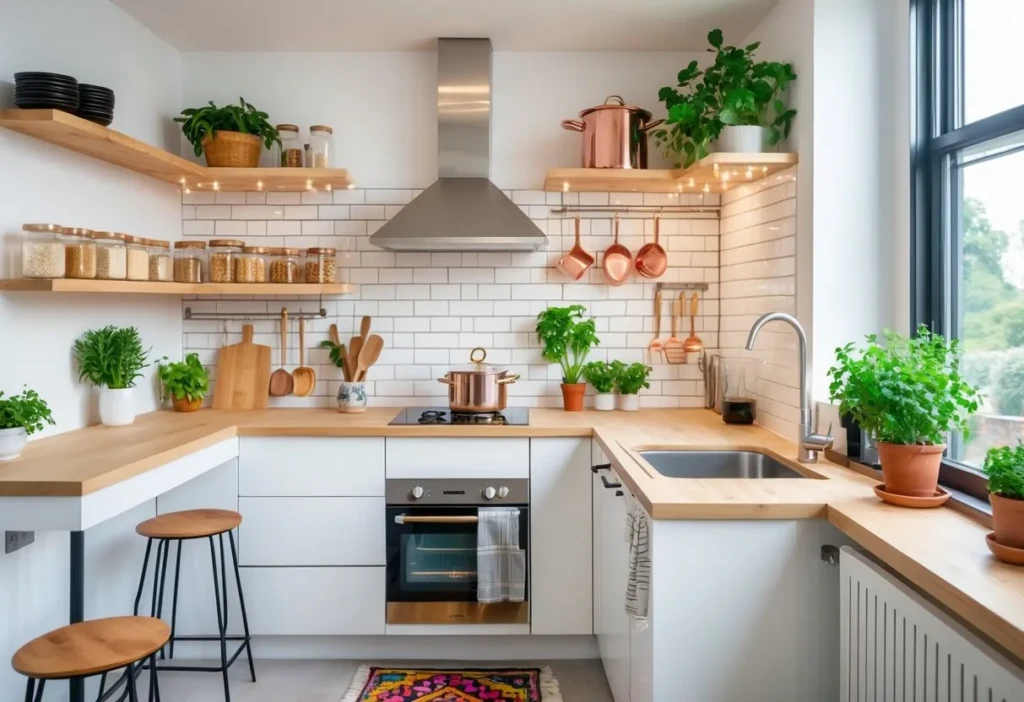
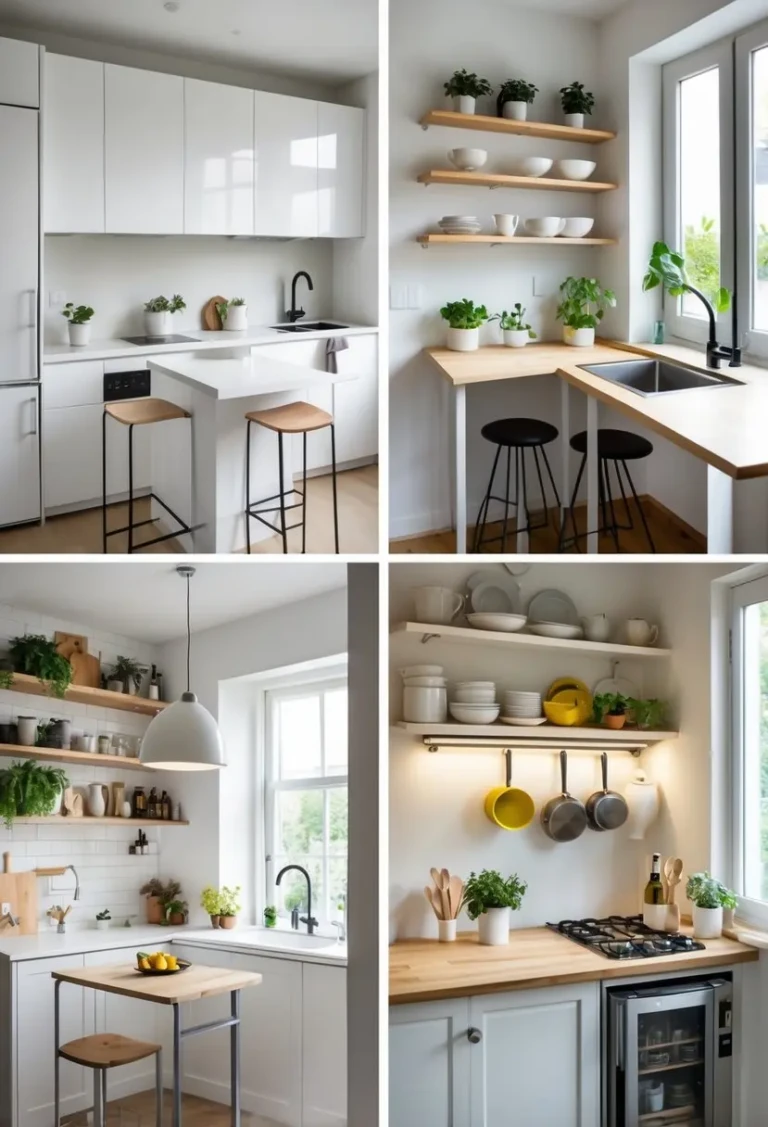
Floating shelves free up counter space and use walls that usually go unused. You can store everyday dishes, cookbooks, or frequently used spices within easy reach.
Choose materials that match your kitchen’s moisture and weight needs, such as solid wood, plywood, or painted MDF. Use sturdy brackets or concealed supports rated for the load you plan to carry.
Keep the arrangement intentional: group like items, leave breathing room, and avoid overloading a single shelf. Add under-shelf lighting or a small rail for hanging utensils to increase function without clutter.
Install shelves at varied heights to accommodate tall items and create visual interest. In tight corners, consider corner floating shelves or a narrow vertical run to make the most of every inch.
2) Use light, neutral paint colors to enlarge the space visually
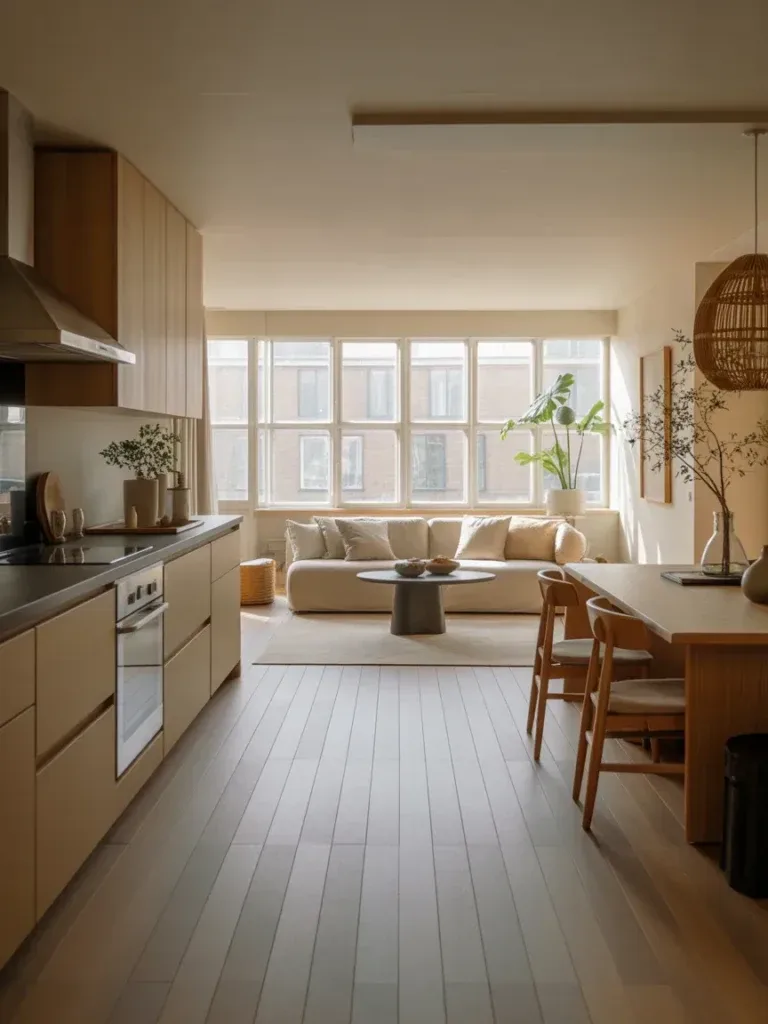
Choose light neutrals—soft whites, warm beiges, pale grays, or muted pastels—to reflect more light and make walls seem to recede. That reflection increases perceived depth and reduces visual clutter, so your kitchen feels airier without changing its footprint.
Keep paint transitions minimal between walls, ceiling, and trim. Using a single or closely related palette avoids harsh lines that break the space into smaller segments.
Consider matte or eggshell finishes on walls to hide imperfections while still bouncing light; reserve satin for trim where you want a subtle contrast. Test samples on multiple walls and observe them at different times of day before committing.
If you want a bit of color, pick a desaturated hue rather than a saturated one. The result remains calm and expansive, while still adding personality.
3) Incorporate under-cabinet LED lighting for better functionality.
Install LED strips or slim light bars under your cabinets to brighten countertops where you prepare food. You’ll reduce shadows and improve visibility for chopping, reading recipes, and small tasks.
Choose a color temperature around 2700–3000K for a warm, kitchen-friendly glow, or 3500–4000K for a crisper, more task-focused light. Dimmable fixtures let you shift from bright work lighting to softer evening ambiance.
Pick plug-in models for easy retrofit, or hardwire if you want a cleaner, permanent look. Consider motion-sensor or stick-on rechargeable options if you prefer no wiring and simpler control.
Run strips along the back edge for even illumination and hide wiring with small adhesive channels or inside cabinet bottoms. Proper placement minimizes glare and keeps your counters looking neat.
4) Choose multi-functional furniture like an island with storage
Pick an island that does more than look good. You gain prep surface, seating, and hidden storage without adding clutter when the piece combines drawers, cabinets, and open shelving.
Measure your space before you shop. A narrow aisle or tight clearance will ruin flow, so leave at least 36 inches around the island when possible, or choose a slim, mobile cart for smaller kitchens.
Consider built-in features that match your routine: a pull-out trash bin, deep pan drawers, or a wine cubby keep everyday items accessible and off countertops. You can also integrate a cooktop or sink if plumbing and ventilation allow.
Choose finishes that blend with existing cabinetry to create visual continuity. Matching materials make a small kitchen feel larger, while varied textures add interest without sacrificing function.
5) Opt for slim-profile appliances designed for compact kitchens.
Choose appliances with narrow widths and reduced depth to free up walking and prep space in tight layouts. Slim-profile refrigerators, dishwashers, and range hoods deliver necessary functions without overwhelming your footprint.
Look for units that prioritize vertical storage or stackable features so you can use wall and cabinet height more efficiently. Multifunction appliances—such as a combined microwave-convection oven or a two-burner cooktop with an integrated griddle—reduce the number of separate machines you need.
Select finishes that match or blend with your cabinetry to create visual continuity and make the room feel larger. Stainless steel, matte, or panel-ready fronts can help maintain a streamlined appearance.
Measure door swings and clearance carefully before buying to avoid fits that block aisles or cabinet doors. Prioritize energy-efficient models to lower running costs, since small kitchens often concentrate heat and ventilation needs.
6) Add a magnetic knife strip to free up counter space
Mount a magnetic knife strip on a wall or the inside of a cabinet to keep knives off your counter and within easy reach. This clears valuable prep space and makes cleanup faster.
Choose a strip sized for your collection and mount it at a comfortable reach—typically between chest and shoulder height. Secure it into a stud or use appropriate anchors for tile or drywall to keep heavier knives safe.
Arrange knives by frequency of use so your go-to blades sit closest to your usual work area. Leave a little space between handles to prevent dinging and to make each knife easy to grab.
A magnetic strip also works for scissors, metal spatulas, and small pans if you need more flexibility. Use a wooden or stainless strip to match your kitchen style while keeping functionality front and center.
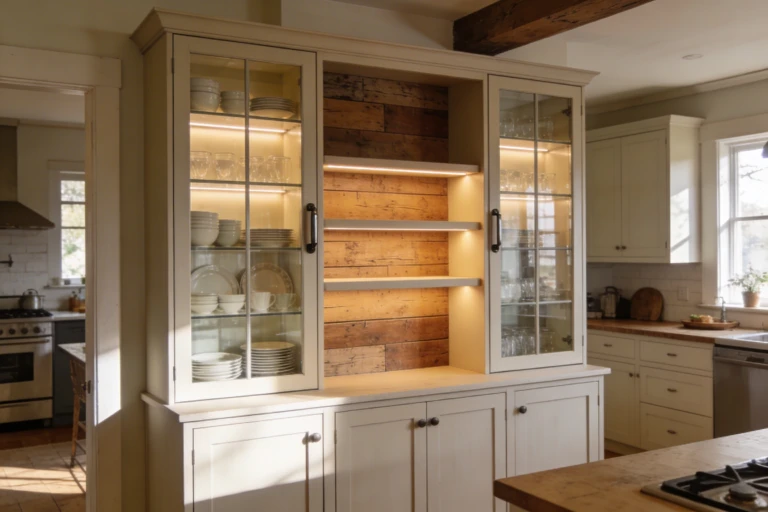
7) Use clear glass cabinet doors to create depth and openness.
Clear glass cabinet doors visually break up solid cabinetry and make your kitchen feel larger without removing storage. You retain enclosed storage while introducing sightlines that draw the eye inward, creating perceived depth.
Display only tidy, curated items so interiors look organized from a distance. Stack plates, arrange matching glassware, and keep frequently used items accessible to balance form and function.
Backlight glass-front cabinets or place them near a light source to enhance transparency and highlight contents. The added light reduces visual weight and amplifies openness during day and night.
Frame glass doors with thin, simple mullions to maintain a clean look. Choose clear glass when you want maximum openness; reserve frosted or ribbed glass where you need concealment.
8) Incorporate pull-out pantry shelves for efficient storage.
Pull-out pantry shelves turn narrow gaps and deep cabinets into usable space, so you can reach items without digging. You’ll avoid items getting lost at the back and save time during meal prep.
Choose full-extension slides and sturdy materials to support cans, jars, and small appliances. Adjustable shelves let you reconfigure storage as your needs change.
Install vertical pull-outs between appliances or at the end of a cabinet run to use wasted space. Slim units work well for spices, oils, and baking sheets.
Label shelves or use clear bins to keep similar items together and visible. That simple step keeps your system functional and reduces clutter.
Maximizing Storage Efficiency
Focus on storing items where you use them and making each surface pull double duty. Prioritize easy-access zones for daily tools and hide less-used items in higher or deeper storage.
Utilizing Vertical Space
Stack cabinets to the ceiling to add 12–24 inches of storage for seasonal items. Use labeled bins on top shelves so you can pull what you need without unpacking everything.
Install open shelving for frequently used dishes and spice jars. Keep heavier items on lower shelves; reserve eye-level space for items you grab daily. Add a wall-mounted rail with hooks for utensils, potholders, and a magnetic knife strip to free drawer space.
Use narrow, tall pull-out cabinets beside the fridge or stove for baking sheets and cutting boards. Add shelf risers and slim baskets inside cabinets to double usable shelf area and prevent lost items in deep corners.
Incorporating Multi-Functional Furniture
Choose a kitchen island with drawers and built-in shelves rather than a plain cart. Select one with a pull-out cutting board, wine rack, or under-counter appliance garage to conceal mixers and coffee machines.
Pick a dining table that folds into the wall or nests with chairs to clear floor space when not in use. Consider a banquette with lift-up seating for pantry overflow—store bulk staples, small appliances, or seasonal cookware inside.
Opt for stools that tuck fully under the counter and a slim console with drawers for mail and small gadgets. Each piece should serve at least two storage or surface functions to justify its footprint.
Creating Visual Space in Small Kitchens
Use color, finishes, and light to make your kitchen feel wider and taller. Focus on paint, reflective surfaces, and layered lighting to increase perceived depth without changing the footprint.
Choosing Light Colors and Reflective Surfaces
Paint walls and ceilings in pale, warm neutrals — soft white, cream, or a warm pebble — to bounce daylight and reduce visual boundaries. Extend the ceiling color one shade lighter than the walls; this draws the eye upward and creates a sense of height.
Select glossy or semi-gloss cabinetry and backsplashes that reflect light. Consider glass-front upper cabinets or a mirrored or high-gloss tile backsplash behind the stove and sink. Keep countertops in a light, subtle pattern to avoid visual clutter.
Use consistent tones across large surfaces. Match cabinet hardware to window frames or light fixtures for continuity. Reserve darker hues for small accents or a single lower cabinet to anchor the room without shrinking it.
Implementing Strategic Lighting Solutions
Layer three types of lighting: ambient (recessed or flush mounts), task (under-cabinet strips for counters), and accent (small directional fixtures or LED tape). Proper layers reduce shadows that make corners feel cramped.
Place under-cabinet lighting close to the backsplash to illuminate work surfaces and showcase reflective tiles. Add a narrow pendant over a peninsula or breakfast bar; choose a slim profile so the fixture doesn’t interrupt sightlines.
Maximize natural light: remove heavy curtains, install a clear or sheer shade, and keep window trim the same light color as the walls. If natural light is limited, use high-CRI LEDs around 2700–3000K for warm, natural-looking illumination.
Listen to this article 10 10 0:00 / 0:00 Speed 0.75×1×1.25×1.5×2× Dreaming of a kitchen that always feels fresh, bright, and effortlessly stylish? Scandinavian design proves you don’t need flashy trends or over-the-top décor to create a space you’ll love for years. Clean lines, natural materials, and thoughtful details work together to make everyday cooking…
Listen to this article 10 10 0:00 / 0:00 Speed 0.75×1×1.25×1.5×2× You want a kitchen that works as hard as you do, even when square footage fights back. This article shows practical, space-smart ideas that make your small kitchen feel organized, brighter, and more functional without a major remodel. Expect straightforward solutions that improve workflow, free up counters,…
Listen to this article 10 10 0:00 / 0:00 Speed 0.75×1×1.25×1.5×2× An inviting kitchen that fits a cozy farmhouse vibe without feeling cramped? Yes, please. Let’s ditch the chaos and design a space where function and charm shake hands every morning. FYI, small kitchens can feel spacious with the right choices, and I’m about to…
Listen to this article 10 10 0:00 / 0:00 Speed 0.75×1×1.25×1.5×2× Tiny space, big dreams? You’re not alone. Open concept layouts can either feel like a breath of fresh air… or like your entire life got shoved into one corner. The trick is all in the design, and these ideas prove you don’t need square…
Listen to this article 10 10 0:00 / 0:00 Speed 0.75×1×1.25×1.5×2× Mid-century modern kitchens just hit differently, don’t they? Clean lines, warm woods, and that effortless cool that somehow never ages. If your current kitchen feels a little…meh, you’re about to get seriously inspired. These ideas bring that retro charm into today’s world without feeling…
Listen to this article 10 10 0:00 / 0:00 Speed 0.75×1×1.25×1.5×2× These eight cabinet ideas prove that small spaces can feel big on charm. We’re talking clever doors, smart storage, and seriously cute vibes that actually work in real kitchens. FYI, you’ll want to bookmark this for your next project. 1. Cottage Shaker Doors With…