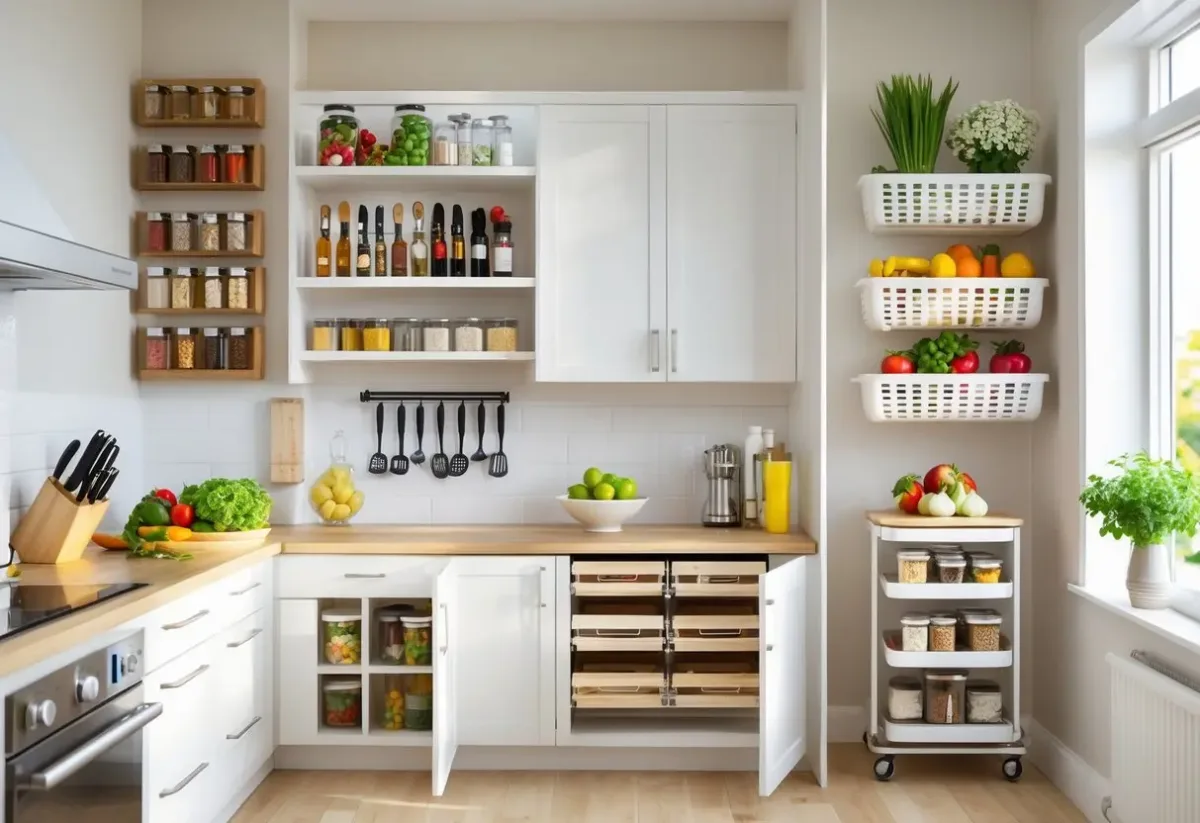
You can reclaim wasted space and make your small kitchen work smarter without a major renovation. This article shows six practical storage ideas that help you access what you need faster, keep surfaces clear, and fit more into the same footprint. You’ll get straightforward solutions that focus on vertical space, better visibility, and smart organization so you can confidently store knives, pans, pantry items, and baking gear. Expect easy-to-implement options that blend function with a tidy look so your kitchen feels larger and runs more efficiently. Homeforia 24inch Walnut Floating Shelves for Wall, High End Solid… TRANSFORM YOUR SPACE – Elevate your decor with our chic, modern floating shelves that ooze elegance. Your walls will nev… BUILT TO LAST – Discover the power of strength with our shelves designed to support even your heaviest items. Built to l… AUTHENTIC WOOD GRAIN – Enjoy the timeless elegance of real wood. Handcrafted from the finest 1.75″ Thick natural pine wo… $74.99 Buy on Amazon Table of Contents1) Install wall-mounted magnetic knife strips to free up drawer space.2) Use pull-out pantry shelves for better visibility and access3) Add a lazy Susan inside corner cabinets to maximize storage.4) Hang pot racks from the ceiling to save cabinet room.5) Incorporate vertical dividers for baking sheets and cutting boards6) Utilize stackable clear pantry containers for uniform storageMaximizing Vertical SpaceCreative Use of Wall-Mounted StorageCabinets Versus Open ShelvingOrganizational Strategies for Small KitchensDecluttering Tips for EfficiencyZoning for Better Accessibility 1) Install wall-mounted magnetic knife strips to free up drawer space. Mount a magnetic knife strip on a wall or the side of a cabinet to remove bulky blocks and crowded drawers. You’ll reclaim counter and drawer space while keeping knives visible and within easy reach. Choose a strip sized to your knife collection and mount it at a comfortable height for safe access. Materials vary—wood, stainless steel, and plastic—so pick one that matches your kitchen’s style and cleaning preferences. Place the strip away from stove splatter and out of reach of small children. Magnetic storage lets blades air dry and prevents them from rubbing together, which helps preserve edge life. If you prefer not to drill, look for adhesive-backed options rated for your knives’ weight or mount the strip under a cabinet. Test the magnet strength before regular use to ensure each knife holds securely. 10″ Strong Adhesive (No Drill) Magnetic Knife Holder for Wall – P… BEFORE YOU PURCHASE: (1) No-Drill Option: Uses included heavy-duty adhesive strips (Not for fridge use). (2) 10″ Long: P… NO DRILL MOUNTING: Apply adhesive strips to the back of your 10” knife holder and stick it to any clean, dry surface. Wa… KNIVES WILL NEVER FALL: This is the strongest knife holder available. Premium neodymium magnets with powerful pull force… $34.95 Buy on Amazon 2) Use pull-out pantry shelves for better visibility and access Pull-out pantry shelves turn deep, wasted cabinet space into fully accessible storage. You can slide the shelf out to see items at the back without removing everything in front. Choose full-extension slides and sturdy construction to handle heavy cans and appliances. Soft-close hardware reduces bangs and helps fragile items stay put. Organize by frequency of use: place everyday items at eye level and reserve higher or lower shelves for occasional goods. Consider adjustable shelves or modular inserts so you can change the layout as your needs evolve. Narrow vertical pull-outs work well between appliances or beside the fridge, while wider units give you room for small appliances and bulk items. Either way, visibility and reachability improve, which reduces waste and speeds up meal prep. Yaheetech Wooden Floor Cabinet, Side Storage Organizer with 4 Dra… Premium Materials: Made from durable CARB P2-compliant MDF and sturdy metal hardware, this bathroom storage cabinet boas… Safety Boost: Includes an anti-tip kit for secure installation, preventing accidental tipping. Built-in drawer stoppers … Generous Storage, Neatly Organized: With 4 smooth-gliding drawers and a side cupboard featuring 2 shelves (1 adjustable … $66.99 Buy on Amazon 3) Add a lazy Susan inside corner cabinets to maximize storage. A lazy Susan turns hard-to-reach corner space into usable, visible storage you can spin to access items quickly. Installations range from simple two-tier turntables to full-height revolving shelves, so choose one that fits your cabinet depth and the items you store. Use the top shelf for everyday items like spices or frequently used condiments; reserve lower tiers for bulkier pans, mixing bowls, or small appliances. Clear or labeled containers keep the rotation tidy and prevent things from tipping when you spin the shelf. If your cabinet has an awkward diagonal corner, consider a pie-shaped or kidney-shaped lazy Susan to match the interior geometry. Proper measurements and sturdy hardware ensure smooth movement and longer life for the mechanism. You can retrofit many existing cabinets without major carpentry, but confirm weight limits and hinge clearance before buying. A well-chosen lazy Susan improves visibility, reduces wasted space, and makes meal prep more efficient. 4) Hang pot racks from the ceiling to save cabinet room. Hanging a pot rack keeps bulky cookware off crowded shelves and puts essentials within easy reach. You’ll free up cabinet space for items that need enclosure, like glassware or pantry goods. Choose a style that fits your kitchen — a rectangular metal grid for an island, a circular chandelier-style rack for centered lighting, or a simple rail with hooks. Measure ceiling height and cooking zones so pots don’t interfere with movement or stove ventilation. Install into ceiling joists or use appropriate anchors; secure mounting prevents dropped cookware and protects finishes. If you rent, consider freestanding ceiling-mounted frames or wall-mounted alternatives that mimic the same vertical storage. A visible rack also becomes part of your kitchen decor, so match finishes to other hardware for a cohesive look. Keep weight manageable by rotating rarely used items into cabinets and reserving the rack for daily pans and frequently used pots. 5) Incorporate vertical dividers for baking sheets and cutting boards Use vertical dividers to store baking sheets, cutting boards, and trays upright so you can grab one without shifting a stack. Upright storage reduces scratches and prevents the avalanche of sliding pans when you open a cabinet. Install freestanding or built-in dividers in a base cabinet, pull-out drawer, or on a countertop corner. Choose adjustable or spaced dividers to accommodate different widths and tall items like baking trays or pizza pans. Wood, steel, and coated wire options work well; pick a finish that resists moisture and is easy to wipe clean. If you rent or don’t want permanent changes, use removable rack organizers that sit inside your cabinet or on a shelf. Reserve one divider slot per commonly used item to keep things visible and quick to access. Labeling slots helps if you share the kitchen, and leaving small gaps prevents scratching and makes retrieval smoother. 6) Utilize stackable clear pantry containers for uniform storage Choose clear, stackable containers to make contents visible at a glance and reduce time searching for ingredients. Uniform shapes let you stack vertically, reclaiming shelf height and creating a tidy visual rhythm. Label lids or fronts with simple text for expiration dates and contents; this keeps rotation consistent and prevents waste. Use airtight versions for staples like flour, rice, and cereal to maintain freshness and block pests. Group similar items together—baking, grains, snacks—so you can pull a whole section without disturbing others. Leave a small empty gap or a shallow tray at the front to slide containers forward easily when you reach for something. Stick to a few sizes to avoid wasted space and mismatched stacks. If shelf depth varies, keep taller containers in the back and shorter ones in front for clear sightlines and easier access. Maximizing Vertical Space Use walls, cabinet faces, and the area above appliances to add storage and free up counters. Hang frequently used tools where you can reach them, stack rarely used items up high, and choose shelving that matches the weight and size of what you plan to store. Creative Use of Wall-Mounted Storage Install a rail or pegboard above your prep area to hang spatulas, ladles, measuring cups, and small pans. Keep hooks at 12–18 inches apart for utensils and 6–8 inches for mugs; label zones so you return items to a consistent spot.Add a magnetic knife strip to free drawer space and keep blades visible and dry. Use narrow wall shelves (4–6 inches deep) for spices and oils; group items by frequency of use so you keep everyday bottles at eye level. Consider a slim, floor-to-ceiling pantry cabinet on an empty wall, or mount a fold-down shelf that becomes extra prep space when needed. Attach wire baskets to cabinet sides for foil, wraps, or dish towels. These solutions reduce clutter and keep work surfaces clear. Cabinets Versus Open Shelving Choose ceiling-height cabinets to gain 12–24 inches of extra storage compared with standard units; use the top shelves for seasonal cookware and serving pieces. Add pull-down shelf hardware if you have high cabinets but limited reach—this keeps heavy items accessible without a step stool.Open shelving shows your dishes and keeps everyday items visible, which speeds up tasks. Limit open shelves to lightweight items and install a rail or lip to prevent dishes from sliding. Mix both approaches: closed lower cabinets for pots, pans, and small appliances; open upper shelves for plates, glassware, and decorative storage jars. This combination balances protection from grease with quick access and visual openness. Organizational Strategies for Small Kitchens Focus on removing rarely used items, grouping what you use together, and assigning fixed spots for daily tasks. Small changes—like a single drawer for prep tools or a shelf just for oils—make routines faster and counters clearer. Decluttering Tips for Efficiency Start by removing duplicates and items you haven’t used in six months. Sort into four piles: keep, donate, store offsite, discard. Be strict with specialty gadgets that occupy drawer space but see little use. Keep only daily and weekly items in prime spots. Store seasonal cookware in a labeled bin on a high shelf or under-bed storage. Use clear containers and label both sides for visibility in deep cupboards. Adopt a one-in, one-out rule for new utensils and appliances. Try a 30-minute monthly edit: scan counters, open one cabinet, and return or relocate anything misplaced. Small, regular purges prevent overwhelming reorganizations. Zoning for Better Accessibility Define zones by activity: prep, cooking, baking, and cleaning. Place knives, cutting boards, and frequently used spices within arm’s reach of your main prep surface. Keep pots, pans, and lids in the cooking zone near the stove. Create a baking kit with measuring spoons, mixing bowls, and flour stored together in a single cabinet or clear bin. Position the cleaning supply zone under the sink with spray bottles on a pull-out caddy and microfiber cloths in a small basket. Use vertical dividers and pegboards to keep zone-specific items upright and visible. Apply shelf risers to double storage in cabinets so each zone has its own accessible layer.
You can reclaim wasted space and make your small kitchen work smarter without a major renovation. This article shows six practical storage ideas that help you access what you need faster, keep surfaces clear, and fit more into the same footprint.
You’ll get straightforward solutions that focus on vertical space, better visibility, and smart organization so you can confidently store knives, pans, pantry items, and baking gear. Expect easy-to-implement options that blend function with a tidy look so your kitchen feels larger and runs more efficiently.
Mount a magnetic knife strip on a wall or the side of a cabinet to remove bulky blocks and crowded drawers. You’ll reclaim counter and drawer space while keeping knives visible and within easy reach.
Choose a strip sized to your knife collection and mount it at a comfortable height for safe access. Materials vary—wood, stainless steel, and plastic—so pick one that matches your kitchen’s style and cleaning preferences.
Place the strip away from stove splatter and out of reach of small children. Magnetic storage lets blades air dry and prevents them from rubbing together, which helps preserve edge life.
If you prefer not to drill, look for adhesive-backed options rated for your knives’ weight or mount the strip under a cabinet. Test the magnet strength before regular use to ensure each knife holds securely.
Pull-out pantry shelves turn deep, wasted cabinet space into fully accessible storage. You can slide the shelf out to see items at the back without removing everything in front.
Choose full-extension slides and sturdy construction to handle heavy cans and appliances. Soft-close hardware reduces bangs and helps fragile items stay put.
Organize by frequency of use: place everyday items at eye level and reserve higher or lower shelves for occasional goods. Consider adjustable shelves or modular inserts so you can change the layout as your needs evolve.
Narrow vertical pull-outs work well between appliances or beside the fridge, while wider units give you room for small appliances and bulk items. Either way, visibility and reachability improve, which reduces waste and speeds up meal prep.
A lazy Susan turns hard-to-reach corner space into usable, visible storage you can spin to access items quickly. Installations range from simple two-tier turntables to full-height revolving shelves, so choose one that fits your cabinet depth and the items you store.
Use the top shelf for everyday items like spices or frequently used condiments; reserve lower tiers for bulkier pans, mixing bowls, or small appliances. Clear or labeled containers keep the rotation tidy and prevent things from tipping when you spin the shelf.
If your cabinet has an awkward diagonal corner, consider a pie-shaped or kidney-shaped lazy Susan to match the interior geometry. Proper measurements and sturdy hardware ensure smooth movement and longer life for the mechanism.
You can retrofit many existing cabinets without major carpentry, but confirm weight limits and hinge clearance before buying. A well-chosen lazy Susan improves visibility, reduces wasted space, and makes meal prep more efficient.
4) Hang pot racks from the ceiling to save cabinet room.
Hanging a pot rack keeps bulky cookware off crowded shelves and puts essentials within easy reach. You’ll free up cabinet space for items that need enclosure, like glassware or pantry goods.
Choose a style that fits your kitchen — a rectangular metal grid for an island, a circular chandelier-style rack for centered lighting, or a simple rail with hooks. Measure ceiling height and cooking zones so pots don’t interfere with movement or stove ventilation.
Install into ceiling joists or use appropriate anchors; secure mounting prevents dropped cookware and protects finishes. If you rent, consider freestanding ceiling-mounted frames or wall-mounted alternatives that mimic the same vertical storage.
A visible rack also becomes part of your kitchen decor, so match finishes to other hardware for a cohesive look. Keep weight manageable by rotating rarely used items into cabinets and reserving the rack for daily pans and frequently used pots.
5) Incorporate vertical dividers for baking sheets and cutting boards
Use vertical dividers to store baking sheets, cutting boards, and trays upright so you can grab one without shifting a stack. Upright storage reduces scratches and prevents the avalanche of sliding pans when you open a cabinet.
Install freestanding or built-in dividers in a base cabinet, pull-out drawer, or on a countertop corner. Choose adjustable or spaced dividers to accommodate different widths and tall items like baking trays or pizza pans.
Wood, steel, and coated wire options work well; pick a finish that resists moisture and is easy to wipe clean. If you rent or don’t want permanent changes, use removable rack organizers that sit inside your cabinet or on a shelf.
Reserve one divider slot per commonly used item to keep things visible and quick to access. Labeling slots helps if you share the kitchen, and leaving small gaps prevents scratching and makes retrieval smoother.
6) Utilize stackable clear pantry containers for uniform storage
Choose clear, stackable containers to make contents visible at a glance and reduce time searching for ingredients. Uniform shapes let you stack vertically, reclaiming shelf height and creating a tidy visual rhythm.
Label lids or fronts with simple text for expiration dates and contents; this keeps rotation consistent and prevents waste. Use airtight versions for staples like flour, rice, and cereal to maintain freshness and block pests.
Group similar items together—baking, grains, snacks—so you can pull a whole section without disturbing others. Leave a small empty gap or a shallow tray at the front to slide containers forward easily when you reach for something.
Stick to a few sizes to avoid wasted space and mismatched stacks. If shelf depth varies, keep taller containers in the back and shorter ones in front for clear sightlines and easier access.
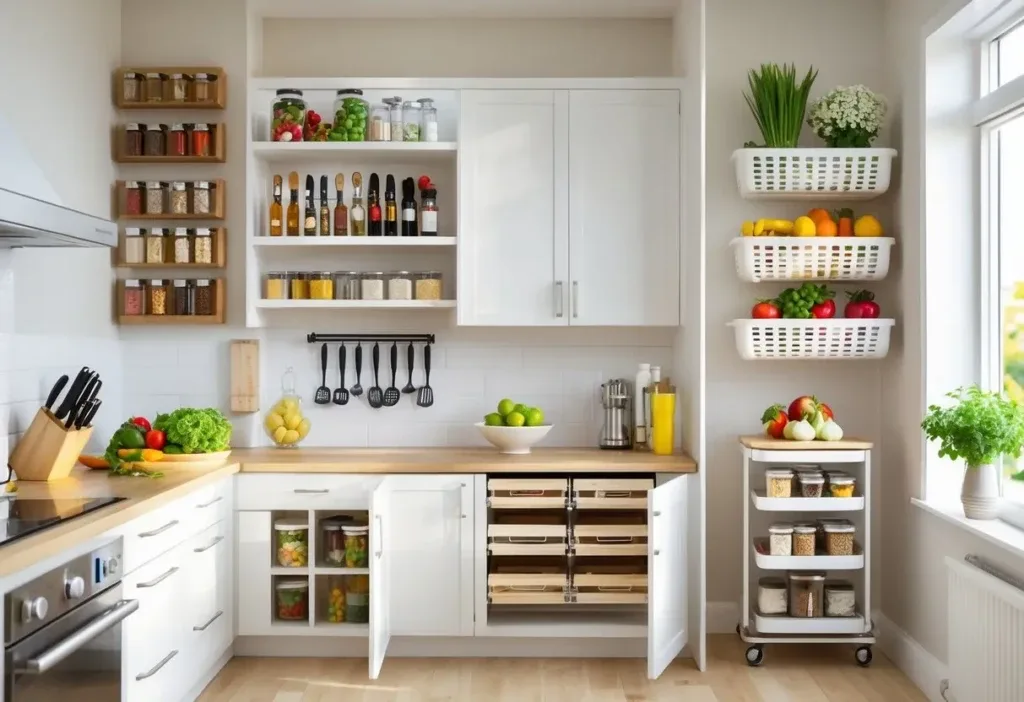
Maximizing Vertical Space
Use walls, cabinet faces, and the area above appliances to add storage and free up counters. Hang frequently used tools where you can reach them, stack rarely used items up high, and choose shelving that matches the weight and size of what you plan to store.
Creative Use of Wall-Mounted Storage
Install a rail or pegboard above your prep area to hang spatulas, ladles, measuring cups, and small pans. Keep hooks at 12–18 inches apart for utensils and 6–8 inches for mugs; label zones so you return items to a consistent spot. Add a magnetic knife strip to free drawer space and keep blades visible and dry. Use narrow wall shelves (4–6 inches deep) for spices and oils; group items by frequency of use so you keep everyday bottles at eye level.
Consider a slim, floor-to-ceiling pantry cabinet on an empty wall, or mount a fold-down shelf that becomes extra prep space when needed. Attach wire baskets to cabinet sides for foil, wraps, or dish towels. These solutions reduce clutter and keep work surfaces clear.
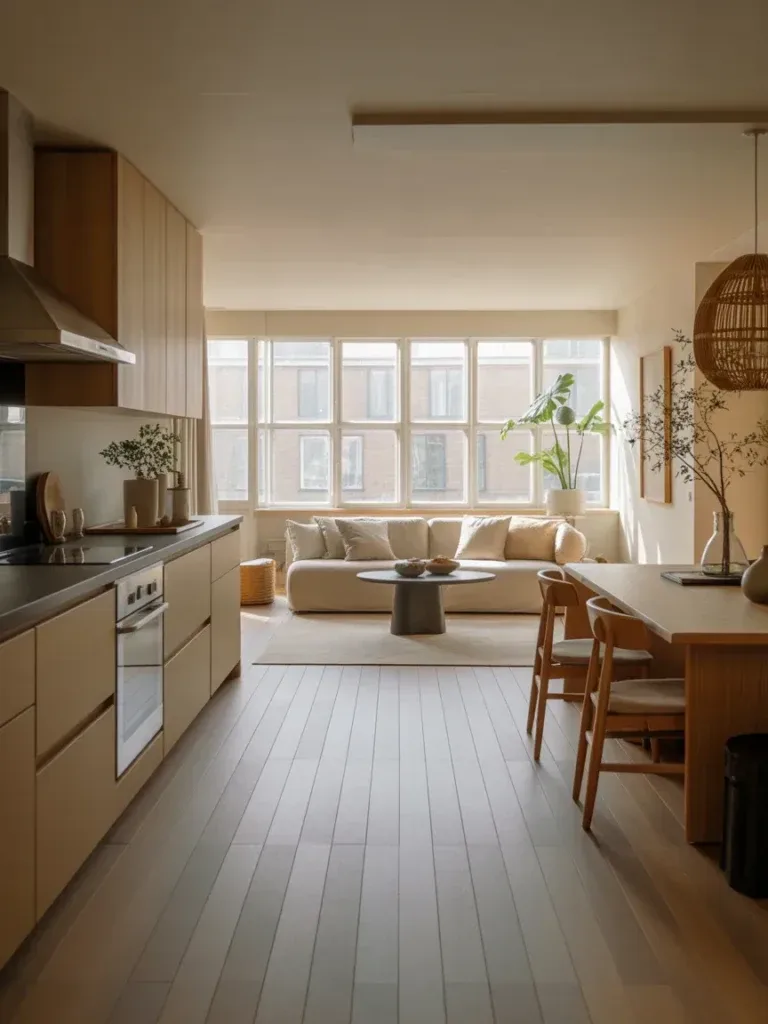
Cabinets Versus Open Shelving
Choose ceiling-height cabinets to gain 12–24 inches of extra storage compared with standard units; use the top shelves for seasonal cookware and serving pieces. Add pull-down shelf hardware if you have high cabinets but limited reach—this keeps heavy items accessible without a step stool. Open shelving shows your dishes and keeps everyday items visible, which speeds up tasks. Limit open shelves to lightweight items and install a rail or lip to prevent dishes from sliding.
Mix both approaches: closed lower cabinets for pots, pans, and small appliances; open upper shelves for plates, glassware, and decorative storage jars. This combination balances protection from grease with quick access and visual openness.
Organizational Strategies for Small Kitchens
Focus on removing rarely used items, grouping what you use together, and assigning fixed spots for daily tasks. Small changes—like a single drawer for prep tools or a shelf just for oils—make routines faster and counters clearer.
Decluttering Tips for Efficiency
Start by removing duplicates and items you haven’t used in six months. Sort into four piles: keep, donate, store offsite, discard. Be strict with specialty gadgets that occupy drawer space but see little use.
Keep only daily and weekly items in prime spots. Store seasonal cookware in a labeled bin on a high shelf or under-bed storage. Use clear containers and label both sides for visibility in deep cupboards.
Adopt a one-in, one-out rule for new utensils and appliances. Try a 30-minute monthly edit: scan counters, open one cabinet, and return or relocate anything misplaced. Small, regular purges prevent overwhelming reorganizations.
Zoning for Better Accessibility
Define zones by activity: prep, cooking, baking, and cleaning. Place knives, cutting boards, and frequently used spices within arm’s reach of your main prep surface. Keep pots, pans, and lids in the cooking zone near the stove.
Create a baking kit with measuring spoons, mixing bowls, and flour stored together in a single cabinet or clear bin. Position the cleaning supply zone under the sink with spray bottles on a pull-out caddy and microfiber cloths in a small basket.
Use vertical dividers and pegboards to keep zone-specific items upright and visible. Apply shelf risers to double storage in cabinets so each zone has its own accessible layer.
Listen to this article 10 10 0:00 / 0:00 Speed 0.75×1×1.25×1.5×2× An inviting kitchen that fits a cozy farmhouse vibe without feeling cramped? Yes, please. Let’s ditch the chaos and design a space where function and charm shake hands every morning. FYI, small kitchens can feel spacious with the right choices, and I’m about to…
Listen to this article 10 10 0:00 / 0:00 Speed 0.75×1×1.25×1.5×2× Tiny space, big dreams? You’re not alone. Open concept layouts can either feel like a breath of fresh air… or like your entire life got shoved into one corner. The trick is all in the design, and these ideas prove you don’t need square…
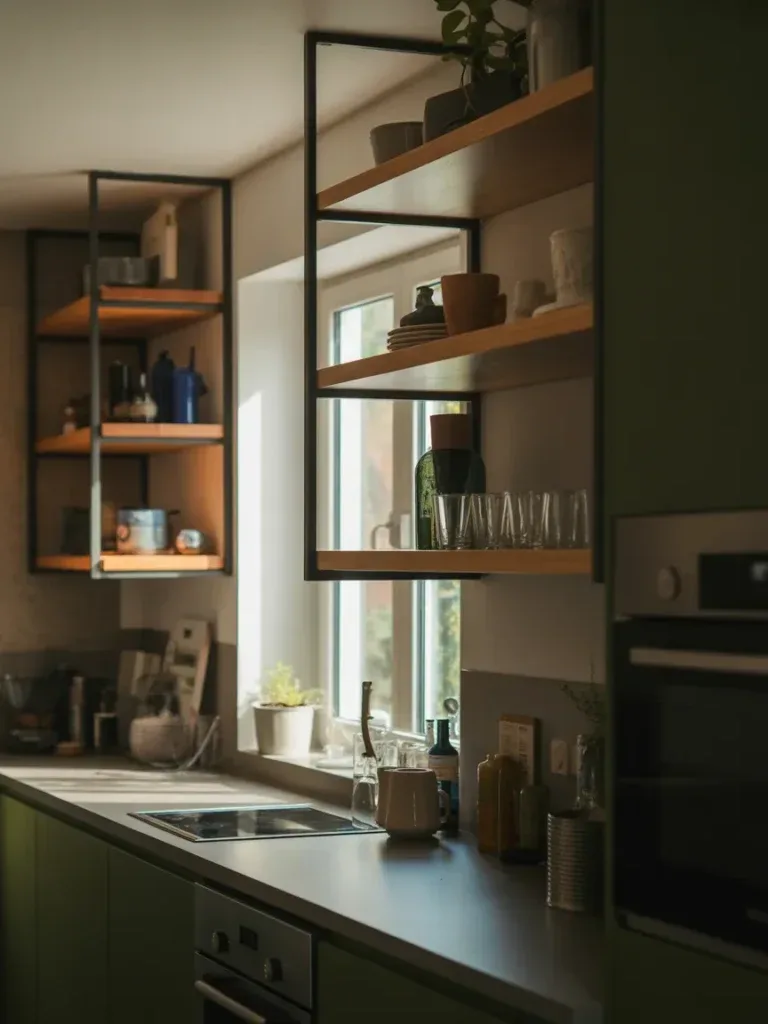
Listen to this article 10 10 0:00 / 0:00 Speed 0.75×1×1.25×1.5×2× Open shelves can make or break your kitchen vibe. Choose the right material, and your space looks straight out of a design magazine. Choose wrong… and suddenly everything feels cluttered and cold. So, wood vs metal open shelves kitchen ideas—which one actually works for…
Listen to this article 10 10 0:00 / 0:00 Speed 0.75×1×1.25×1.5×2× If you’re squeezing a kitchen into a tiny farmhouse or just crave that country charm, you’ve landed in the right spot. We’ll keep it practical, friendly, and a little cheeky as we map out a layout that looks and feels bigger than it is….
Listen to this article 10 10 0:00 / 0:00 Speed 0.75×1×1.25×1.5×2× An outdoor kitchen can turn a basic backyard into the place where everyone mysteriously wants to hang out every weekend. Suddenly your patio becomes the unofficial family headquarters, your friends “just happen” to stop by around dinner, and you become that person with the…
Listen to this article 10 10 0:00 / 0:00 Speed 0.75×1×1.25×1.5×2× If you’re tired of plain white kitchens but don’t want a space that feels dark and gloomy, Iron Ore kitchen cabinets might be exactly what you’re looking for. This rich charcoal shade delivers drama, elegance, and a surprisingly timeless appeal. It feels bold without…