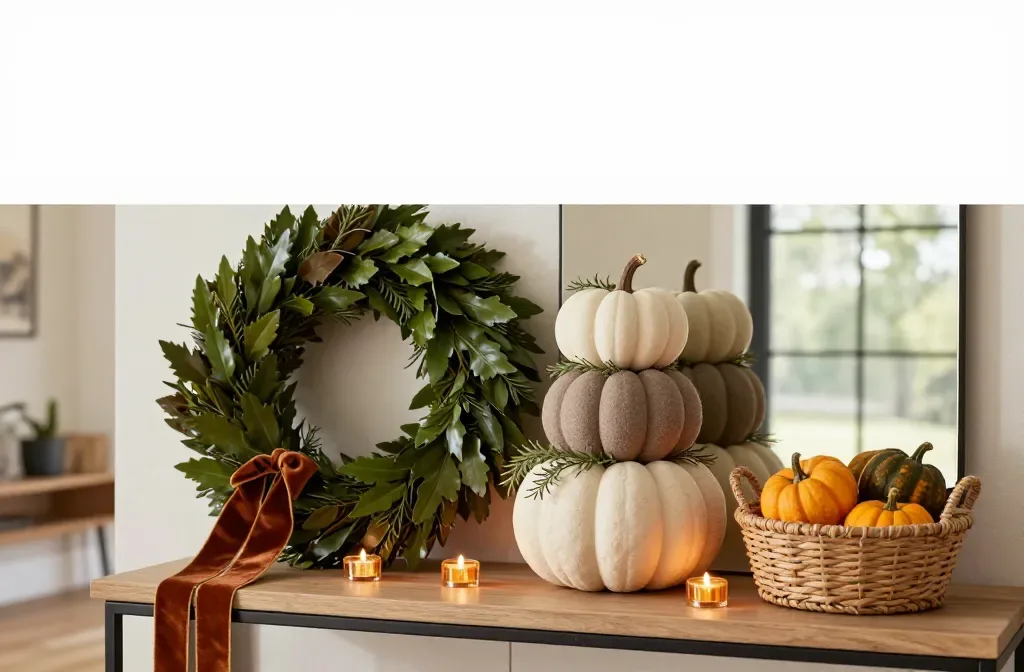
10 Diy Dollar Store Fall Decor That Looks High-End
The dollar store fall aisle is mostly foam pumpkins, plastic leaves, and craft-store basics — nothing that looks expensive on the shelf. What makes DIY dollar store fall decor look high-end isn’t the materials, it’s what you do to them before they hit your mantel: paint that mutes the plastic sheen, texture layered in threes, and a finishing touch (velvet ribbon, a stain, real leaves) that a straight-off-the-shelf piece never gets. If you want more of this same approach across a whole room, these dollar store fall decor ideas that look high-end cover a few techniques this list doesn’t.
Ten projects are below, roughly in order of how much time each one takes. None of them need a glue gun skill level beyond “has used one before.”
What Makes DIY Dollar Store Fall Decor Look Expensive
Three things separate a dollar-store project that looks cheap from one that reads as high-end, and none of them cost extra money.
- Muted paint over bright plastic. Foam pumpkins and plastic leaves come in saturated orange and green. A coat of cream, taupe, or rust acrylic — even a thin, uneven dry-brush coat — kills the plastic look almost instantly.
- Odd numbers and varied heights. Three pumpkins, not two or four. Bottles of three different heights, not a matched set. Symmetry reads store-bought; slight imperfection reads handmade-on-purpose.
- One real material in the mix. A velvet ribbon, real cinnamon sticks, a jute tassel, or actual pressed leaves next to the faux pieces. The contrast in texture is what your eye catches first, before it registers anything else in the vignette.
Key Takeaways
- Paint and dry-brushing do more for a “high-end” look than any single material choice.
- Group in odd numbers and vary the heights — it’s the fastest style upgrade on this list.
- Start with the no-glue, no-paint projects if you’re short on time; save the painted pumpkin stack for a weekend.
- Mix in one real material (ribbon, cinnamon, real leaves) per vignette for contrast against the faux pieces.
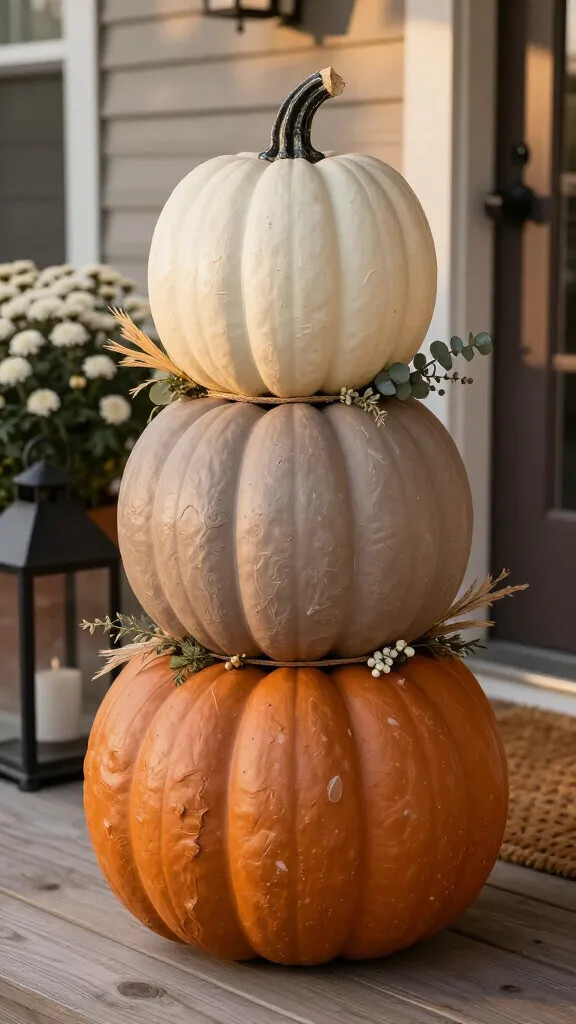
1. Pumpkin Stack Glow-Up (No Carving, All Class)
Foam pumpkins are the closest thing the dollar store has to a blank canvas. Stack three, paint each a different neutral, and you’ve got a porch piece that reads as a purchased decor item rather than a $3 craft.
Materials
- 3 foam pumpkins, varied sizes if you can find them
- Acrylic paint — cream, taupe, and rust
- Hot glue, floral picks, Spanish moss
- Utility knife, twine
How to Build It
- Slice the stems off the bottom two pumpkins with a utility knife so they stack flat.
- Paint each pumpkin a different neutral — cream on top, taupe in the middle, warm rust on the bottom.
- Glue the stack together, then tuck moss and floral picks (eucalyptus, wheat, small white berries) around each seam.
- Wrap thin twine around the base of each tier to hide any glue lines.
💡 Pro Tip: Dry-brush the paint instead of coating it solid — dip the brush lightly, wipe most of it off on a paper towel first, then brush over the ridges. The foam’s natural texture shows through and it reads far less “craft project” than a flat, even coat.
Set the finished stack by the front door or on a console table where the height gets noticed.
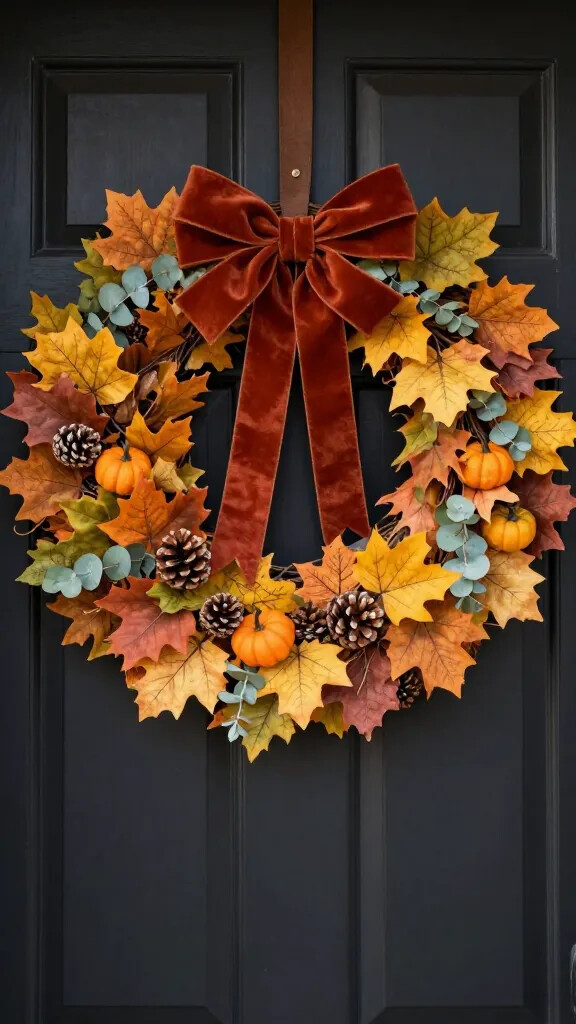
2. Thrift-Chic Leaf Wreath With a Luxe Ribbon
Wreaths get expensive fast at a home store, but a wire frame and dollar-store leaf stems get you most of the way there for a few dollars. The ribbon is what actually sells the “boutique” look, so don’t skimp on that one piece.
Tips
- Mix leaf colors and shapes — burnt orange, golden yellow, and olive green — for real depth instead of one flat tone.
- Bend the stems around the frame before gluing anything, so you can see the fullness and fix gaps early.
- Use a wider ribbon (2 inches or more) in velvet or satin for a double bow — thin ribbon looks like an afterthought.
Attach leaf stems to a wire or grapevine form with floral wire, tuck in a few mini pumpkins or pinecones for texture, then tie the ribbon off-center rather than dead-center at the top. Centered bows read as default; an off-center bow reads as styled on purpose.
Hang it on the door, lean it against a mantle, or prop it above a mirror.
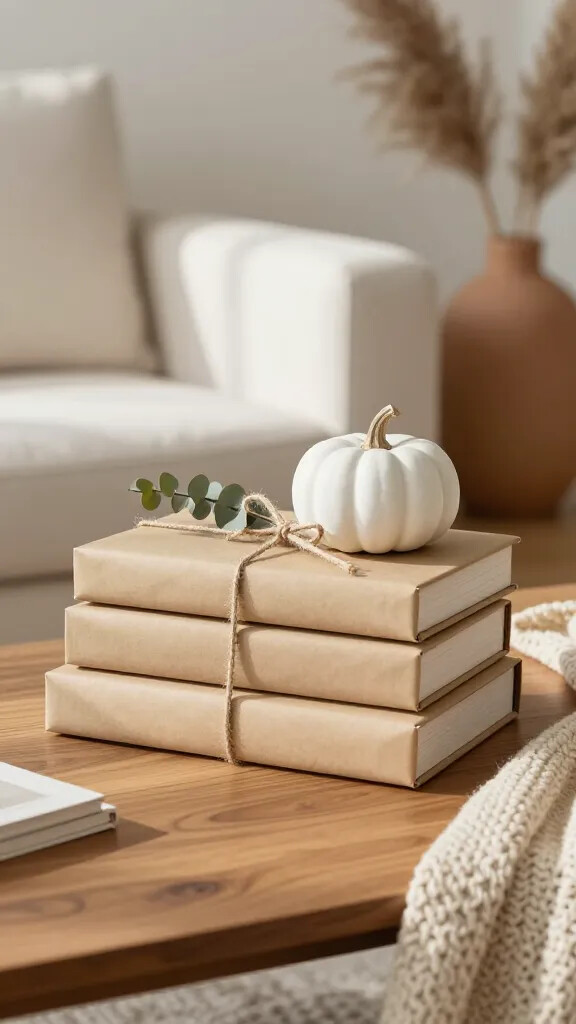
3. Cozy Bookstack With Lettering
Wrapping plain boxes or old paperbacks in kraft paper turns them into a minimalist “designer” bookstack — the kind you see styled on a coffee table in a catalog. It adds height to a vignette without adding clutter, which is the part most dollar-store decor gets wrong.
Key Steps
- Wrap three paperbacks or small boxes tightly in kraft paper, taping the seams on the underside only.
- Hand-letter or stamp the spines with short words — “Gather,” “Grateful,” “Cozy” — rather than a full sentence.
- Tie the stack with twine and tuck a small eucalyptus sprig under the knot.
- Top with a small ceramic or wood pumpkin for a finished, layered look.
Keep the palette neutral so the lettering is what stands out. This works equally well on an entryway table, a coffee table, or a bookshelf.
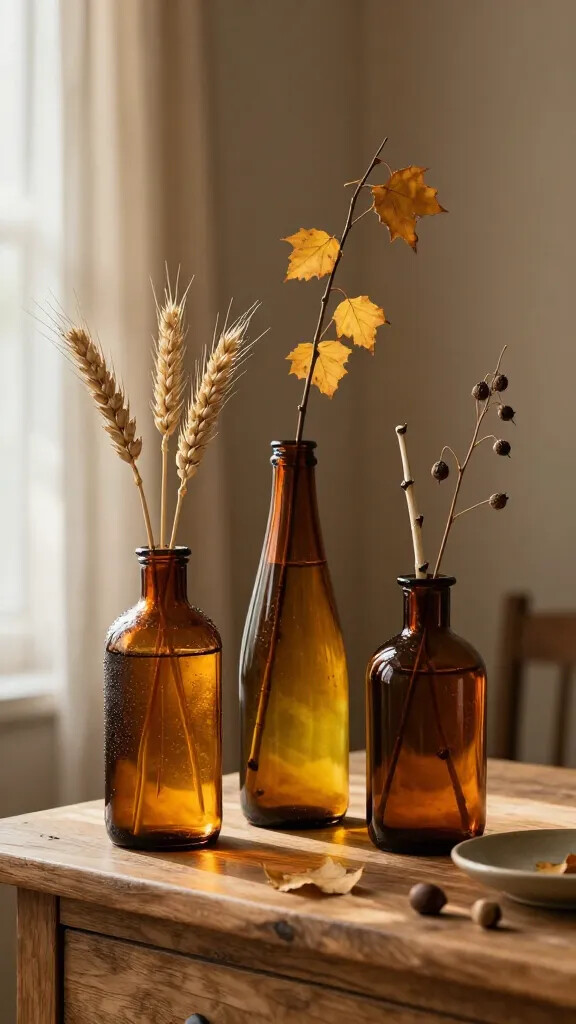
4. Faux Amber Bottles With Foraged Branches
Amber glass reads as fall instantly, and you don’t need to buy actual amber glass to get it. Clear bottles, a little Mod Podge, and a couple drops of food coloring get you the same warm, cognac-to-honey tone.
Materials
- Assorted clear bottles or vases, in different heights
- Brown and yellow food coloring (or alcohol ink), plus Mod Podge
- Faux wheat stems or actual foraged branches
Mix Mod Podge with a few drops of brown and a touch of yellow until you get a warm amber tone, swirl it around the inside of the bottle to coat, then drain the excess and let it dry upside down so it doesn’t pool at the bottom. Style the bottles in threes with tall branches for height.
💡 Pro Tip: Drain the bottle upside down over paper towels, not right-side up. Mod Podge pools at the base if it dries flat, and you’ll get a cloudy ring at the bottom instead of an even tint.
These work well on a mantle, dining table, or kitchen counter.
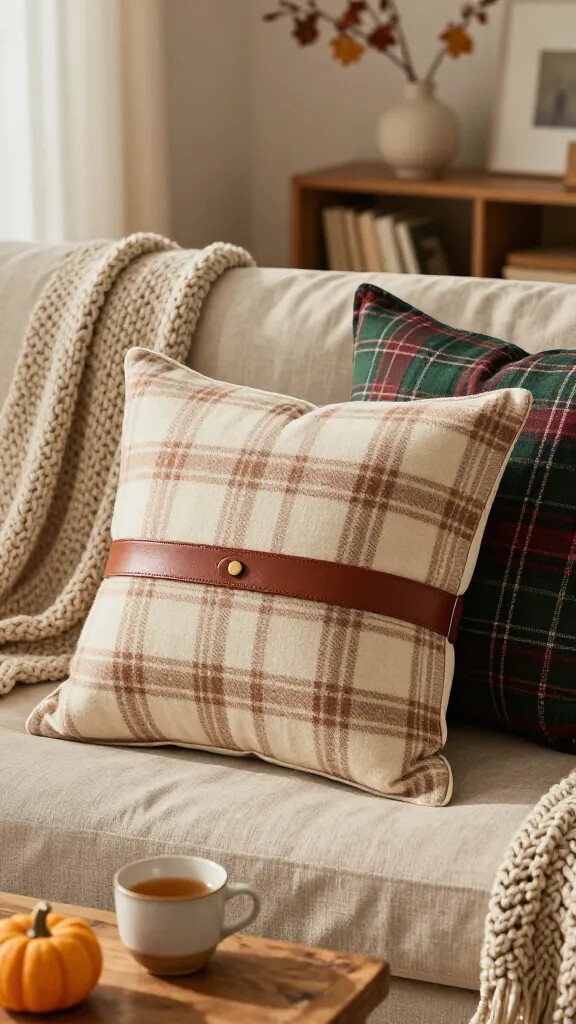
5. Plaid Pillow Covers From Dollar Store Scarves
New pillow covers add up fast if you’re covering a whole sofa. A couple of plaid scarves and a no-sew wrap method get the same look for a fraction of the cost, and you can switch them back before the season’s over.
How-To
- Wrap a 16×16 pillow insert with a scarf the way you’d wrap a gift.
- Secure the back flap with fabric glue or a couple of safety pins.
- Add a thin leather strip or a button on the front seam for a tailored finish.
Pick scarves in muted tones — camel, forest green, cranberry — so the pillows read as a set even if the patterns don’t match exactly. This is the fastest, highest-impact swap on this list, and it’s fully reversible, which makes it a good option for rentals.
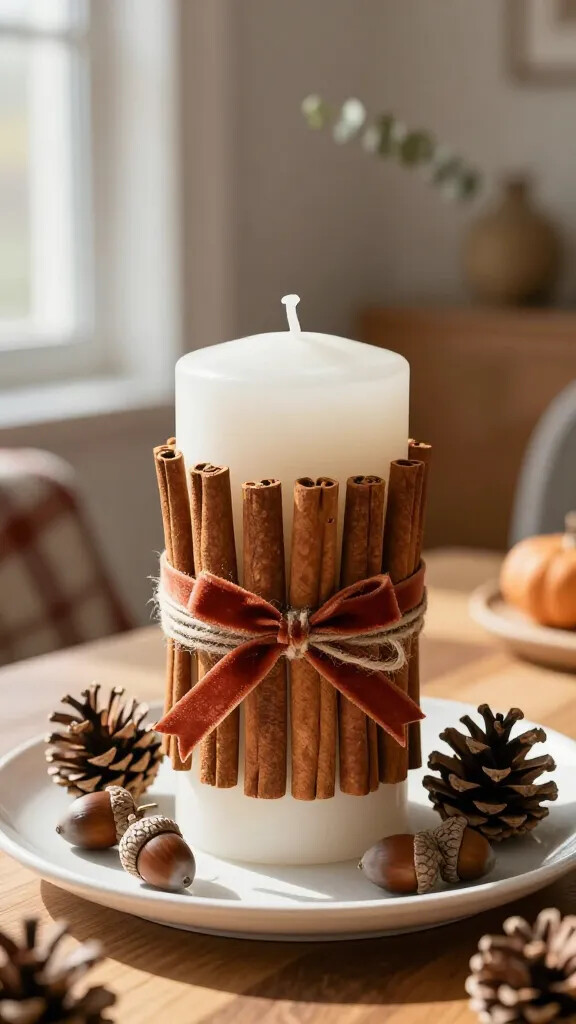
6. Cinnamon-Stick Candle Wraps
An unscented pillar candle wrapped in real cinnamon sticks brings a warm, bakery-like scent into a room without you having to light it. It’s one of the cheapest projects here and one of the fastest — under fifteen minutes once you’ve got the sticks.
Materials
- Unscented pillar candles, 3-4 inches wide
- Cinnamon sticks, plus twine or ribbon
- Hot glue or double-sided tape
Attach the cinnamon sticks vertically around the candle and secure them with twine, then layer a thin velvet ribbon over the twine for a finished edge. Set the candle on a ceramic plate and scatter a few acorns or mini pinecones around the base. Group two or three at different heights on a tray for a dining table or entryway centerpiece.
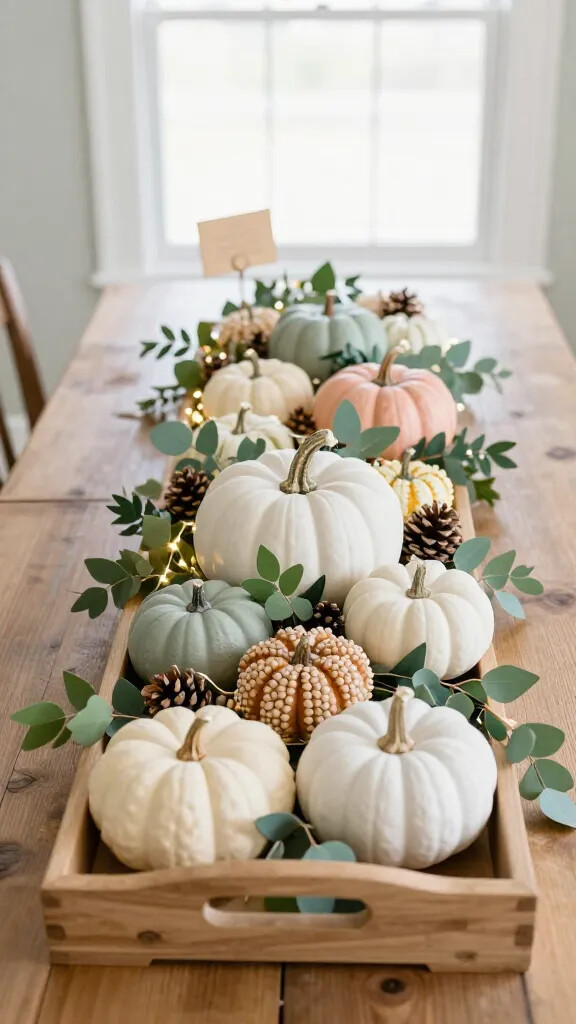
7. Elevated Pumpkin Patch Centerpiece Tray
A tray styled with mixed pumpkins and greenery does more for a table than a single centerpiece piece — the texture and height variation are what make it look curated instead of thrown together.
Build It
- Start with a neutral serving tray or a cutting board as the base.
- Lay faux eucalyptus or maple leaf garland across it in a loose S-curve, not a straight line.
- Add pumpkins in mixed finishes — ceramic, foam, knit, wood-bead — and mixed sizes.
- Weave in a strand of warm fairy lights and tuck a few pinecones into the gaps.
Varying the pumpkin finishes is what makes this one work; an all-matching set of pumpkins looks like a store display, not a styled vignette. The tray moves easily between the coffee table and the dining table, which makes it one of the more practical pieces here.
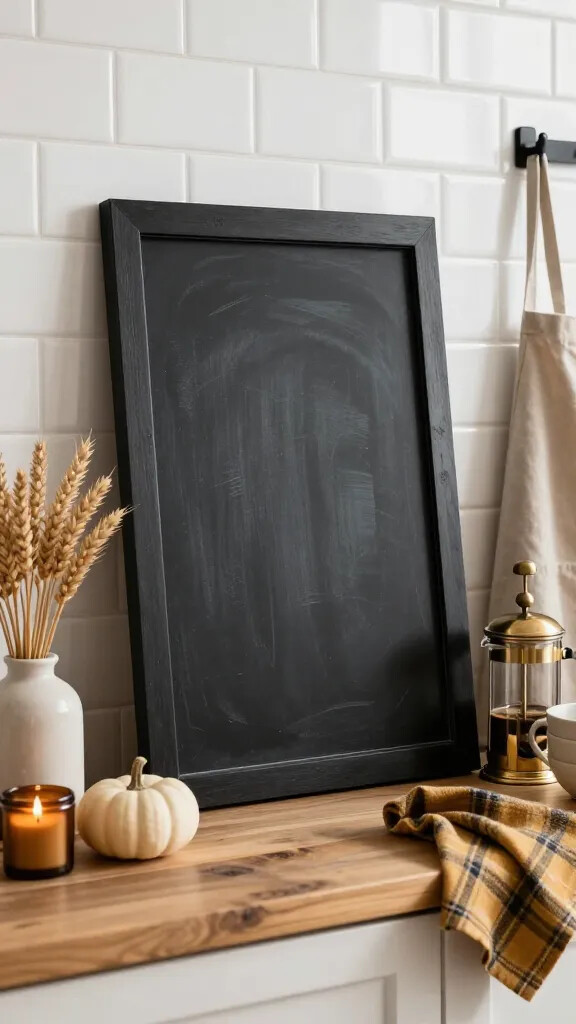
8. Chalkboard Menu Sign for Cozy Nights In
A cheap picture frame turns into a chalkboard menu sign with a can of chalkboard spray paint and about twenty minutes of drying time. It’s decor that actually does something, which is rarer than it sounds on this list.
Steps
- Pop the glass out of the frame and paint the backing board with chalkboard paint — two thin coats, not one thick one.
- Spray-paint the frame itself matte black or antique gold.
- Once both are fully dry, write your weekly menu or a short seasonal line on the board.
Style it on a kitchen shelf near your coffee station, next to a small vase of dried wheat or a mini pumpkin.
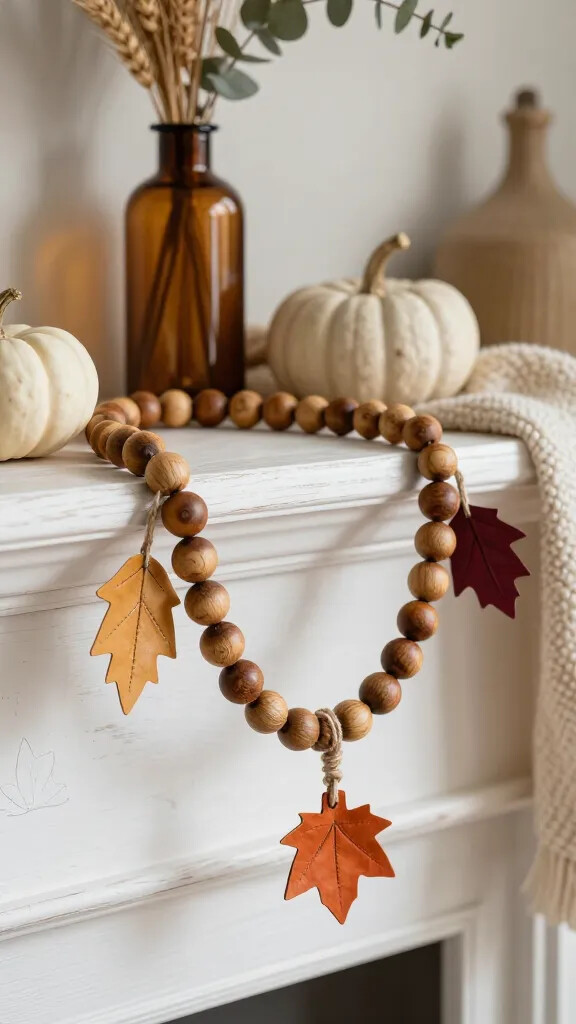
9. Rustic Bead Garland With Leaf Charms
Wooden bead garlands show up everywhere in home decor right now, usually at a markup that doesn’t match how simple they are to make. Threading beads onto twine is genuinely a ten-minute project once you’ve got the beads and a leaf charm to finish the end. For more ways to layer garland and greenery across a mantel, these fall mantle decor ideas build on this same layering approach.
Materials
- Wooden beads, assorted sizes from the craft aisle
- Jute twine
- Faux leather leaves or cardstock leaf cutouts
- Diluted brown stain or paint (optional)
String the beads onto the twine, tie a small jute tassel on one end, and finish the other with a leaf charm. If you want a more worn look, rub a light coat of diluted brown paint over the beads and wipe off the excess before it dries — it settles into the grain and ages the wood without hiding it.
💡 Pro Tip: Wipe the stain off within a minute or two of applying it. Wait too long and it dries tacky on the surface instead of settling into the wood grain, and you’ll end up with a blotchy finish instead of an even, worn look.
Drape the finished garland across books, a tray, or a mantel to tie separate vignettes together.
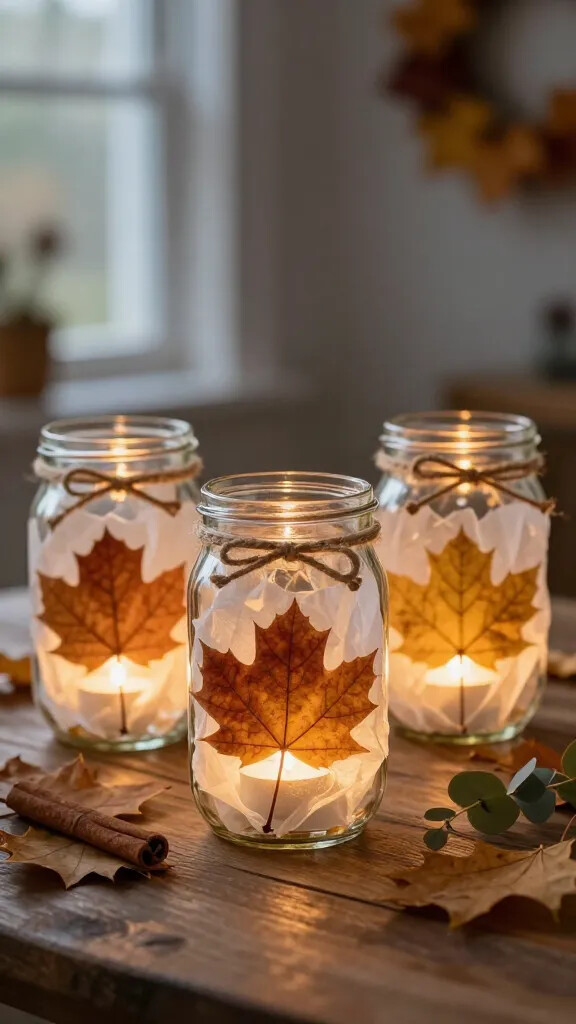
10. Harvest Jar Lanterns With Pressed Leaves
Mason jars wrapped in tissue paper and pressed leaves create a stained-glass effect once a tealight is lit inside — it’s the one project on this list that looks noticeably different at night than it does during the day.
How-To
- Gather clean mason jars or recycled glass jars in a couple of sizes.
- Press real leaves flat in a heavy book for about a day, or use thin faux leaves if you’re short on time.
- Brush a layer of Mod Podge onto the jar, place the leaves, then cover with a thin layer of white tissue paper.
- Seal with another coat of Mod Podge, tie twine around the rim once dry, and drop in an LED tealight — not a real flame, since the tissue is a fire risk.
The tissue paper is what softens the light and gives the stained-glass effect; skipping it leaves you with a jar that just looks like it has leaves glued to the outside. Cluster a few different sizes on a mantel or line them along porch steps for the evening.
Which Project to Start With
| If you have… | Start with | Save for later |
|---|---|---|
| 15-20 minutes | Plaid pillow covers, cinnamon candle wraps | Pumpkin stack, amber bottles |
| An hour, no paint drying time to spare | Bead garland, bookstack, jar lanterns | Chalkboard sign (needs drying time) |
| A full afternoon | Pumpkin stack, leaf wreath, pumpkin patch tray | N/A — good projects to batch together |
Things to Consider Before You Start
- Acrylic paint on foam pumpkins usually needs 20-30 minutes to dry to the touch between coats — plan around that if you’re doing multiple layers.
- Real leaves (pressed or foraged) will fade and dry out faster than faux ones, especially near a window — expect to swap them out partway through the season.
- Hot glue works on foam, wood, and fabric, but it won’t hold well on glass for long — use a stronger adhesive or floral tape for the amber bottle project if you’re layering anything onto the glass itself.
- If you’re short on time, pick 2-3 projects instead of all 10 — a few well-finished pieces read as more intentional than ten half-effort ones scattered around the house.
DIY Dollar Store Fall Decor: FAQ
Will dollar store fall decor actually look cheap up close?
The base pieces (foam pumpkins, plastic leaves) can, if you use them straight out of the package. Paint, dry-brushing, and mixing in one real material — ribbon, cinnamon sticks, real leaves — are what close that gap.
What’s the single best upgrade if I only have time for one project?
The plaid pillow covers. They take the least time, need no paint drying time, and change the whole feel of a living room the fastest.
Can I use real leaves instead of faux ones in these projects?
Yes, for the jar lanterns and leaf wreath especially — pressed real leaves look better than faux in both. Just know they’ll dry out and become brittle faster than faux leaves, so they’re better for a project you’ll refresh partway through the season rather than one you want to last through winter.
How long does the amber bottle paint trick actually take?
The coating itself takes about five minutes per bottle. Drying time is the real variable — give it a few hours upside down before you handle it, longer if you used a thick coat.
Do I need special tools for any of these?
No — a hot glue gun, a utility knife, and basic paintbrushes cover every project on this list. Nothing here requires a power tool.
Our Verdict
Start with the pillow covers and the cinnamon candle wraps if you want the fastest payoff — both take under twenty minutes and change how a room feels immediately. Save the pumpkin stack and the leaf wreath for a weekend when you don’t mind paint drying time between steps. If you end up wanting to carry the same look into other rooms once the fall pieces are done, fall floating shelf decor ideas and these rustic fall decor ideas both build on the same layering and mixed-texture approach. And once fall decor is up, Thanksgiving decorating ideas is a natural next stop for the same tablescape and mantel pieces.